How to Plan Your First Route in RVRouteplan
A step-by-step walkthrough of planning a real RV route — setting your stops, entering your rig's dimensions, picking campgrounds, and editing the trip after.

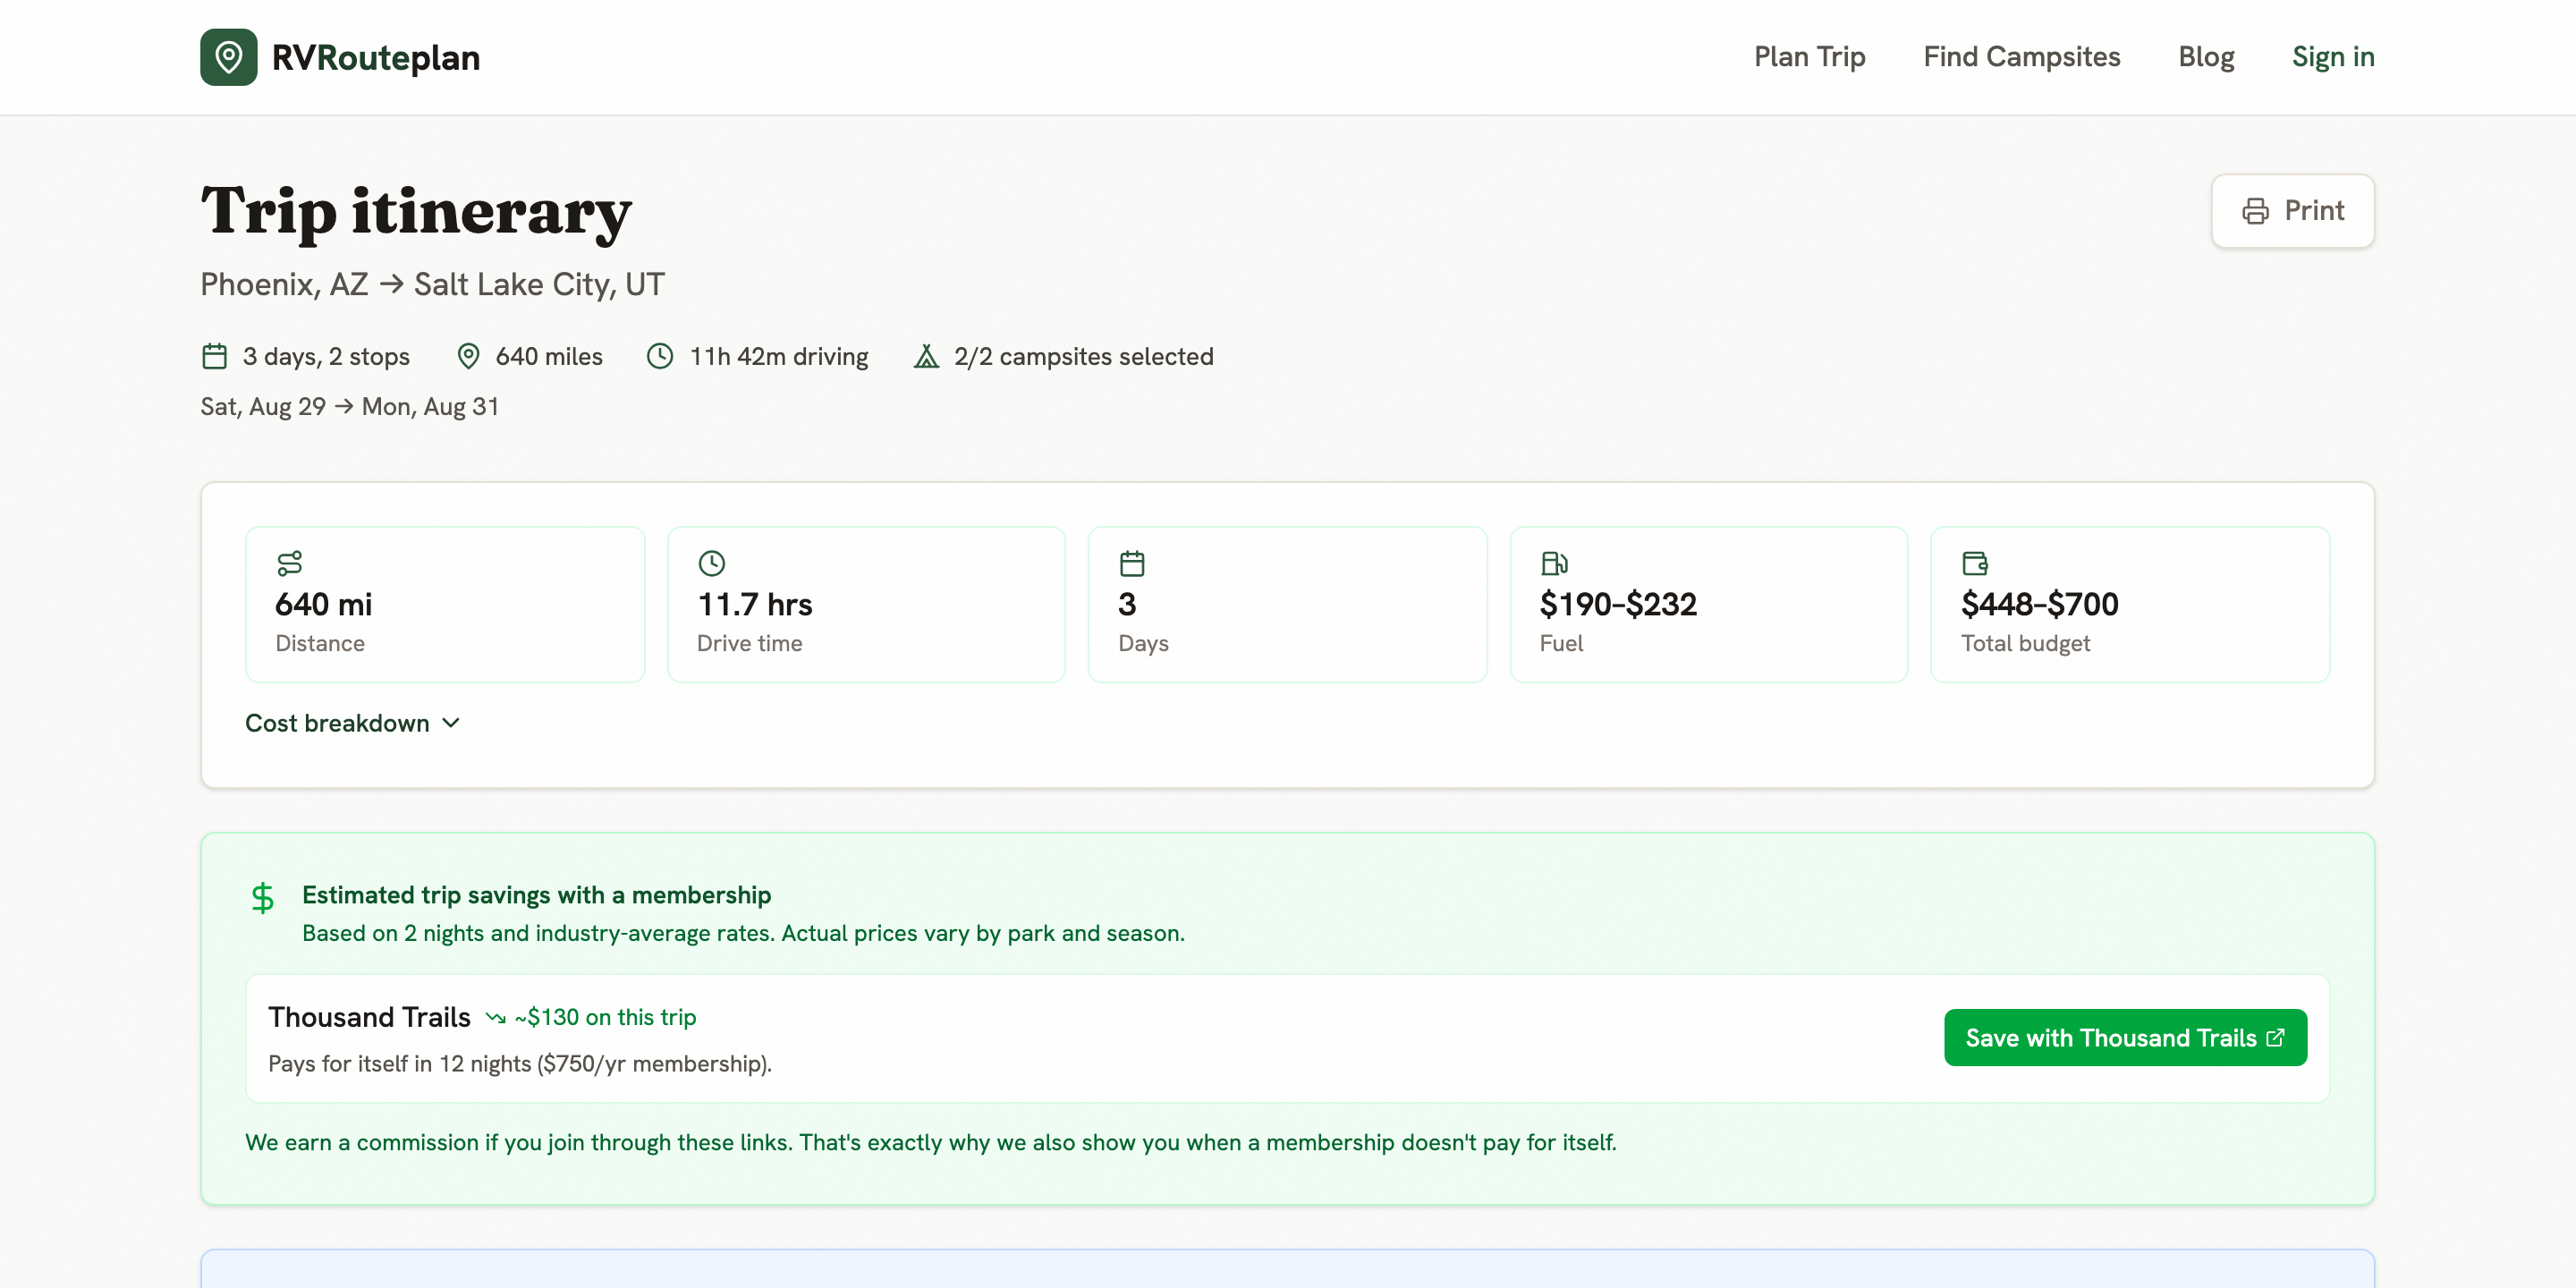
This is the first in a series of guides to getting the most out of RVRouteplan. We’ll plan one real trip end to end — Phoenix to Salt Lake City in a 40-foot Class A — and every screenshot below comes from that actual run.
The whole thing takes about five minutes. You don’t need an account to do it.
Start at the planning form
Head to rvrouteplan.com/plan. The form is one page, and only two fields are required: Starting Location and Destination. Everything else sharpens the result.

The location fields aren’t plain text boxes — they’re backed by Google Places, restricted to the US, and they accept more than cities. National parks, state parks and attractions all resolve, so Zion or Canyonlands works as well as Kanab, UT. Pick from the dropdown rather than typing and moving on; the field only registers your choice once you select a suggestion.
Adding stops you refuse to skip
Add Stop inserts a waypoint between your start and destination. Use it for the places the trip exists for — a national park, a friend’s driveway, a rally. Each stop gets arrows to move it up or down and an ✕ to delete it.
Two things worth knowing:
- Add two or more stops and an Optimize stop order button appears. It checks whether a different order is shorter and shows you the diff — Current order versus Suggested order, with the miles and hours you’d save. You either Use this order or Keep current order. Nothing changes unless you say so.
- Adding stops changes what happens next. With stops, RVRouteplan hands you a finished multi-day route to adjust. Without them, it walks you through the route one day at a time. Both are covered below.
Set your departure
The When do you leave? card defaults to next Saturday at 8:00 AM. This isn’t cosmetic — it’s what drives the arrival and departure time on every stop in your itinerary, and each one is shown in that stop’s own local time zone. Cross from Arizona into Utah in summer and the itinerary shows the MST → MDT change on the leg where it happens.
Your entry is interpreted in the time zone of your starting location, not your laptop’s.
Tell it about your rig
This is the step most people skip and shouldn’t.

Height, width and weight feed a routing engine that avoids roads with known height and width restrictions. Leave the fields blank and you get standard car routing — which is exactly how RVers end up nose-to-nose with an 11’8" underpass.
Once your route is built, you’ll see a badge confirming what it routed for — Routing for your RV: 13′6″ tall · 8′6″ wide · 26,000 lbs — and an amber warning box if the chosen route still includes restrictions worth knowing about.
One caveat the app repeats and so will we: this avoids known restrictions. Always double-check overpasses and grades for your specific vehicle.
Choose your campground networks

Check the networks you actually hold memberships in: Thousand Trails, RPI, KOA, Good Sam. This doesn’t filter anything out — it changes how options are ranked and labelled. When you’re choosing where to stop for the night, each candidate town shows how many of its nearby campgrounds fall in your networks, and says so plainly when none of them do: None in your preferred networks — stop here anyway?
Add interests (optional)

Interests are what turn a route into a trip. Pick chips across six groups — Nature, Food & Drink, History & Culture, Active, Family, Photography — and each day of your itinerary gets an Along the way section with points of interest and how far off-route each one sits.
Leave it blank if you only care about campgrounds. Nothing breaks.
Then hit Plan My Trip.
Build the route, one day at a time
If you planned without intermediate stops, this is where RVRouteplan earns its keep. Instead of dropping a finished route on you, it asks a question:

Every candidate stop shows you the four things that actually decide a driving day:
- Distance and drive time from where you are now.
- Network badges — TT, RPI, GS, KOA — for what’s nearby.
- How many campgrounds are within reach.
- An honest warning. 3.6h under target means you’re stopping early. Long day (9.0h) is a stretch. Very long day (12.0h) – Not recommended is the app telling you not to.
Nothing on this list is hidden or greyed out. The 12-hour day is right there if you want it — it’s just labelled for what it is.
Don’t like any of them? Add Custom Stop / Detour takes any town you name and recalculates from there.
If you did add stops on the planning form, you’ll instead land on a complete day-by-day route with a Route summary sidebar and a Change button on every day. Same information, different starting point.
Pick a campsite for each night
Choose a stop and the campground list for that town opens immediately.

Every card carries the details that decide it: network affiliation, distance from town and miles off your route, hookups, pull-through, WiFi, pets, pool, laundry — and maximum rig length, which is the one that quietly disqualifies half the list when you’re at 40 feet. Each card links straight out to Google Maps, Apple Maps or Waze.
Two escape hatches sit on this screen:
- No campsite this night — boondocking, family, or off-grid at the top, for the nights you’re not paying for a site. It counts as a decision, so the route keeps moving.
- ← Back to Cities if you’ve decided this town was the wrong call.
Repeat until you reach your destination. One detail catches people out: the View Trip Itinerary button only appears once your final day has a campsite selected or explicitly skipped. If you’re staring at a finished-looking route with no button, that’s why — resolve the last night.
Your itinerary
The itinerary is the version you travel with.

Up top you get the trip totals — days, stops, miles, driving hours, and how many nights still need a campsite — plus a cost card with fuel and total budget, and a Cost breakdown you can expand. If a membership would have paid for itself on this trip, it says so, with the math. If it wouldn’t, it stays quiet.
Each day card gives you:
- Arrival, Stay, Departure. The − and + buttons change how many nights you stay, and every downstream date shifts to match. The pencil icons override an arrival or departure time outright.
- Along the way — your interest stops, with off-route mileage.
- Change campsite, Skip — boondock/family, and Remove on the campground you picked.
- A chevron to expand Campgrounds near [town] (50 miles) and browse in list or map view without leaving the itinerary.
Changing the trip after you’ve built it
Plans change mid-trip. A few things worth knowing:

- + Add a stop after Day N sits between every pair of day cards. Give it a town and a number of nights and it routes your RV from the previous stop and renumbers everything after it. The last one reads Add a stop after your destination, for when the trip grows a tail.
- Filter Campsites at the top of the itinerary applies to every day at once — hookups, pull-through, WiFi, pool, pets, networks, plus rig type and length.
- Currently here marks the leg you’re on, based on today’s date. Running a day behind? Hit I’m still here on the previous day and the app follows your lead until you tell it to Resume auto-detect.
- Print gives you a clean paper copy for the dash.
Before you close the tab
If you planned that trip signed out, it lives in your browser’s local storage — that one browser, that one device. Clearing site data or hitting Start Over loses it.
A free account persists trips server-side and lets you save routes as reusable templates and store RV profiles so you’re not re-typing your dimensions every trip. Pro adds public share links, PDF and GPX export, big-rig and 55+ filters, and remembered interests.
Next in this series
Coming up: getting more out of the campsite search, using membership networks without overpaying, and setting up RV profiles and templates so your second trip takes ninety seconds instead of five minutes.
Got a workflow you want covered? Reply and tell us what you’re stuck on.